El Blog

×××
  • Andrzej Dragan: El Retrato Inusual


    Andrzej Dragan nació en 1978 y estudió en Varsovia (capital de Polonia). Disfruto de becas en Amsterdam, Oxford y Lisboa. Concluyó su carrera de Física, le concedieron múltiples premios y reconocimientos en esta disciplina científica.

    Andrzej Dragan was born in 1978 and studied in Warsaw (the capital of Poland). He took advantage of grants to visit Amsterdam, Oxford and Lisbon. He finished his Physics degree and has won several prizes and gained recognition in this scientific discipline.

    Allegory on the Truth de Andrzej Dragan

    A participado en diversas conferencias y seminarios en Amsterdam, Cracovia, Glasgow, Munich, Oxford, Varsovia, Tokio… Actualmente trabaja como profesor auxiliar de Física en la Universidad de Varsovia.

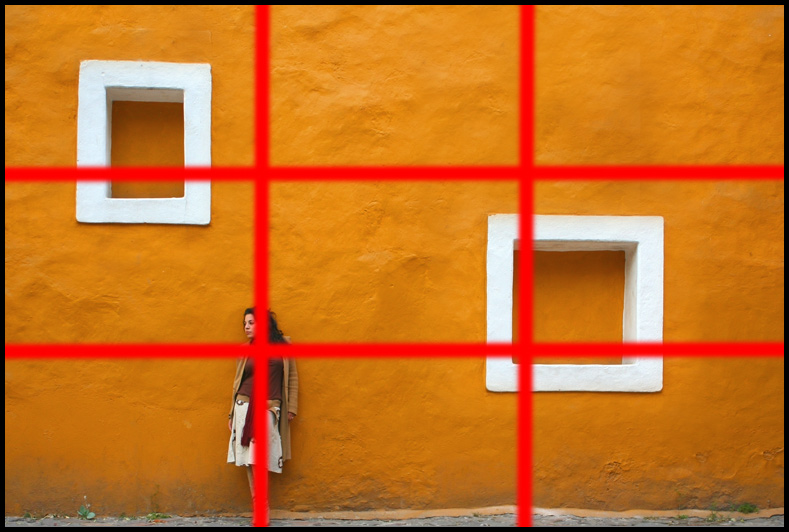
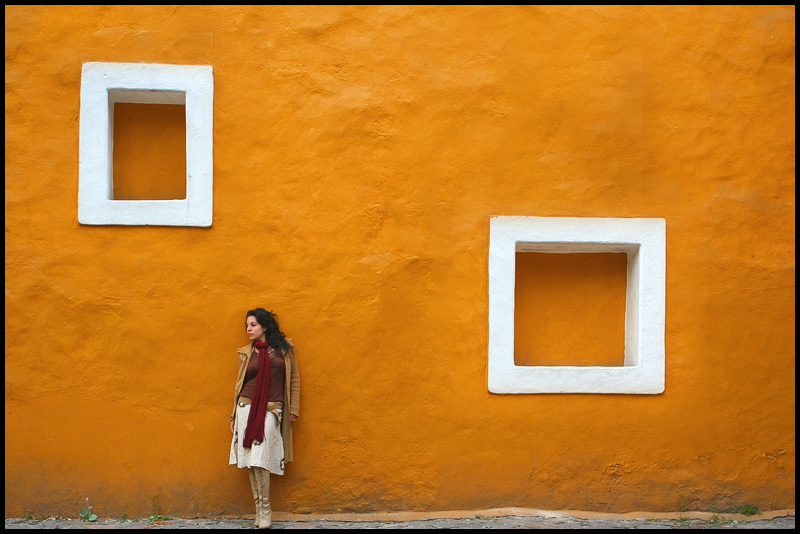
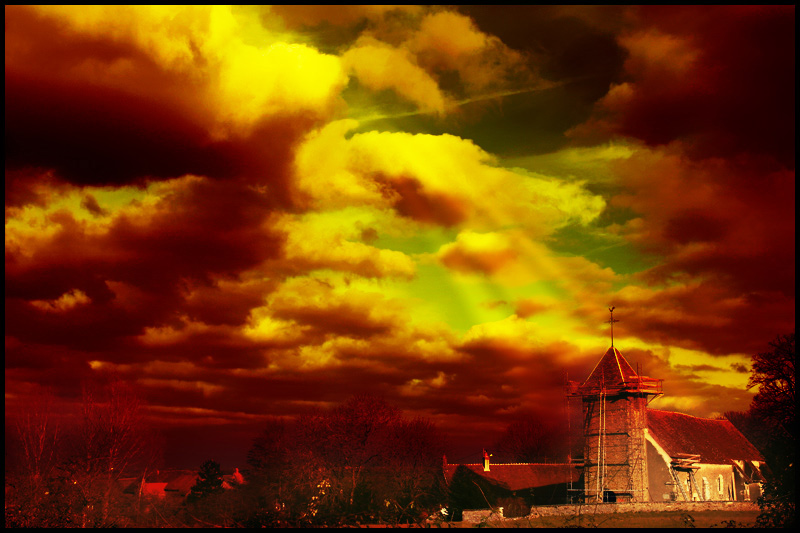
    Este singular artista nos sorprende con retratos que han dado lugar a una línea de trabajo inquietante: el estilo Dragan. Unos retratos que buscan un punto de vista muy alejado de la belleza convencional, buscan la provocación del espectador utilizando con gran maestría una iluminación radical que acentúa las facciones y expresiones de sus protagonistas.

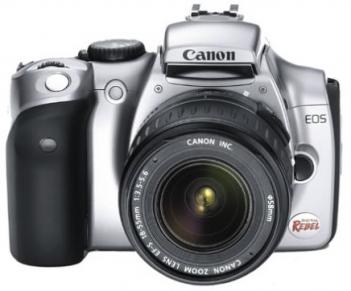
    Equipo fotográfico: Utiliza una Canon 1Ds con un objetivo Canon 24-70 f/2.8L y una caja de luz con un flash. Para las sesiones comerciales usa una Hasselblad H2 con respaldo digital.

    Software: El único software que utiliza es Adobe PhotoShop.

    Fotógrafos favoritos
    : Declara no tener fotógrafos favoritos.

    Consejo para los que comienzan
    : Sólo uno. Nunca tomar consejos.

    Sin lugar a dudas, un artísta con una obra y personalidad muy controvertida.

    Muchas gracias por conceder la entrevista, Andrzej.

    He has participated in various conferences and seminars in Amsterdam, Krakow, Glasgow, Munich, Oxford, Warsaw, and Tokyo. At the moment he teaches physics at the University of Warsaw.

    This outstanding artist has surprised us with portraits which have given rise to a disturbing style of work: the Dragan style. Portraits which move away from conventional beauty and provoke the viewer by masterly using radical illumination which accents the features and expressions of the subjects.

    Photographic equipment: He uses a Canon 1Ds with a Canon 24-70 f/2.8L lens and a light box with flash. For commercial sessions he uses a Hasselblad H2 with digital support.

    Software: the only software he uses is Adobe Photoshop.

    Favourite photographers: He says he does not have any favourites.

    Advice for beginners: Only one piece of advice. Never take advice.

    Without doubt an artist whose personality and work is very controversial.

    Thank you very much for the interview Andrzej.

  • Sirenas de María Peinado


    María Peinado nos envía un retrato de Marta y Mari Carmen, que realizó con su Olympus E-500 para que lo analicemos en la sección FotoClínica.

    Maria Peinado has sent us this portrait of Marta and Mari Carmen, which she took with her Olympus E-500, to be analysed in the Photoclinic section.

    Los datos del disparo:

    Abertura f4.5
    Velocidad 1/125sg
    Longitud focal 150 mm
    ISO 400

    Utilizó el recurso del corte voluntario y al usar una abertura de diafragma tan grande consiguió disminuir drásticamente la profundidad de campo, con lo que la niña de la izquierda quedó fuera de enfoque. Este desenfoque aporta la sensación de tridimensionalidad.

    La ausencia de una luz óptima obligó a utilizar una abertura como la f4.5 y una sensibilidad tan alta….400. La utilización de una velocidad más baja… hasta un 1/80sg le habría permitido usar una ISO más baja.

    She used a voluntary cut and by using such a large aperture she managed to drastically reduce the depth of field so that the girl on the left is out of focus. This lack of focus provides a three dimensional sensation.

    The absence of optimal lighting made Maria use an aperture of f4.5 and a high ISO… 400. the use of a slower speed… 1/80sec would have allowed her to use a lower ISO.

    Sirenas de María Peinado

    La sensibilidad 400 fue la responsable de que la imagen tenga ese ruido. Nada que no se pueda subsanar durante el postprocesado con programas como el NeatImage.

    The noise in the image is due to the ISO 400. Nothing which cannot be remedied during post processing using programs such as NeatImage.

    Tras aplicar un ajuste de curvas para mejorar el contraste y reducir el ruido obtuvimos esta imagen:

    Sirenas de María Peinado retocada por jgarcía

    Si María hubiera dado un paso a su derecha habría eliminado el espacio gratuito que existe entre las dos niñas y por tanto conseguido un encuadre más compacto.

    If Maria had taken one step to her right the free space which exists between the two girls would have been eliminated so achieving a more compact frame.

    Propuesta de punto de vista

  • Ventanas de Mario Alberto Morales


    El actor mexicano Mario Alberto Morales nos envía dos fotografías (original y retocada) para que las analicemos en la sección Fotoclínica.

    The Mexican actor Mario Alberto Morales sends us two photographs (original and retouched) to be analysed in the Photoclinic section.

    Cámara Canon EOS DIGITAL REBEL XT
    Velocidad de obturación 1/60 seg.
    Abertura: F/5
    Longitud focal: 35mm
    ISO: 200

    Ventanas de Mario Alberto Morales

    Mario Alberto aplicó un ajuste de Brillo-Contraste y con la herramienta Tapón de Clonar (Modo: Normal; Opacidad 87%; Flujo 70%;) retocó el muro, para paliar los desconchones.

    Mario Alberto adjusted the Brightness-Contrast and with the Clone Stamp (Mode: Normal; Opacity 87%; Flow 70%) he retouched the wall to fix the imperfections.

    Ventanas de Mario Alberto Morales RETOCADA

    Estupenda fotografía que con el pequeño retoque gana mucho, aunque los desconchones no siempre deben considerarse molestos, pues pueden aportar una nueva textura a la imagen.

    A fine photograph which gains a lot from this small retouch, although imperfections should not always be considered to be negative as they can provide a new texture to an image.

    Si no tenemos prejuicios, y nos tomamos la licencia artística de recomponer la escena con el fin de buscar el mayor equilibrio compositivo basándonos en la Regla de los Tercios podríamos obtener esta distribución:

    Equilibrio Compositivo

    Le apliqué un retoque para hacer los colores más intensos, una máscara de enfoque y nivelé el horizonte.

    I applied a retouch to intensify the colours, an unsharp mask and I levelled it out horizontally.

    Ventanas retocada por jgarcía

  • Paisajes de Mordor


    En la mitología creada por J.R.R. Tolkien para su célebre novela «El Señor de los Anillos«, Mordor es la región de la Tierra Media que constituyó el feudo del señor oscuro Sauron hasta la conclusión de la Guerra del Anillo, en el año 3.019 de la Tercera Edad del Sol.

    In the mythology created by J.R.R. Tolkien for his celebrated novel “The Lord of the Rings”, Mordor is the region of Middle Earth which constitutes the fief of the dark lord Sauron until the end of the War of the Ring, in the year 3019 of the Third Age of the Sun.

    Un mundo irreal, fantástico, que en alguna ocasión nos podemos ver obligados a recrear para portadas de novelas, discos ópticos…

    Vamos a ver como se puede aplicar este efecto a uno de nuestros paisajes:
    Fotografía original

    1.-
    Duplicamos el fondo (Ctrol+J).
    2.- Capa/Nueva capa de relleno/Color Sólido, Modo Color Burn-Subexponer color, usamos el #de8c15.
    3.- Color primario Negro y color secundario Blanco (pulsamos tecla D).
    4.- Con un pincel suave eliminamos el tono rojizo de la parte inferior de la imagen (recomendable el uso de tableta digitalizadora).
    5.- Capa/Nueva capa de ajuste/Curvas. Mejoramos el contraste de la imagen.
    6.- Creamos una nueva capa con la combinación de todas las que existen actualmente (Ctrol+Shift+Alt+E).
    7.- Aplicamos un Desenfoque Superficial – Surface Blur con un Radio-Radius 16px y un Umbral-Threshold de 11 niveles.
    8.- Por último, ajustamos la Opacidad de esta última capa a nuestro gusto.

    1.- Duplicate the background (ctrl.+J).
    2.- Layer/New Fill Layer/Solid Colour, Mode Colour Burn-Underexpose colour, use #de8c15.
    3.- Primary colour Black and secondary colour White (press D).
    4.- With a soft brush eliminate the reddish tone in the lower part of the image (I recommend the use of a graphics tablet).
    5.- Layer/New Adjustment Layer/Curves. Improve the contrast of the image.
    6.- Create a new layer by combining all layers which exist at the moment. (Ctrl+Shift+Alt+E).
    7.- Apply a Surface Blur of radius 16px and a threshold of 11 levels.
    8.- Lastly, adjust the opacity of this new layer to suit.

    Fotografía retocada

    Siguiendo una sugerencia de nuestro amigo Osselín he añadido unos rayos.

    Complying with the suggestion of our friend Osselín I have added some bolts of lightning.

    Paisaje Mordor con rayos

  • Portada en Foto Retoque Digital


    Acaba de salir a la venta un nuevo número de la revista mensual Foto Retoque Digital de la Editorial Ares en la que aparece una entrevista con el autor de Urban Woman y en la portada una fotografía de la versátil actriz Sandra Fradera modelada por el prestigioso estilista italiano Andrea Bellini.

    The new edition of the monthly magazine Foto Retoque Digital has just been put on sale. Inside there is an interview with the author of Urban Woman and on the cover a photograph of the versatile actress Sandra Fradera prepared by the prestigious Italian stylist Andrea Bellini.

    Foto Retoque Digital Número 19 - Enero 2007 -

  • Premios 20Blogs


    Hoy comienzan las votaciones para elegir los blogs más populares de la Red. En esta edición he presentado jggweb para probar suerte. Espero vuestro apoyo.

    Today begins the voting to choose the most popular blogs on the web. This time I have presented jggweb. I look forward to your support.

    Muchas gracias.

  • Amour Platonique


    Un profundo sentimiento que forma una imagen ideal de la persona amada, sin establecer con ella ningún tipo de relación real.

    El Amor Platónico concede una importancia más espiritual que sensual al amor. Se trata de una elevación filosófica de la manifestación de una idea hasta la contemplación de la misma, que varía desde la apariencia de la belleza hasta el conocimiento puro y desinteresado de su esencia.

    Sandra 3 - jgarcía © 2006 -

    Cámara Nikon D200
    Abertura f11
    Velocidad 1/250sg
    Longitud focal 110mm
    ISO 100

  • Añadir Lágrimas


    Para que luzca una lágrima en el rostro, podemos emplear una gota de agua, de serum o de glicerina, pero también podemos añadirla durante el postprocesado mediante un retoque muy sencillo.

    Para ilustrar la técnica, emplearemos el retrato titulado Miss you de Omar Franco:

    To show a tear on a face we can use a drop of water, serum or glycerine, but we can also easily add the tear during post processing.

    Miss you de Omar Franco

    Debemos instalar el conjunto de pinceles Pretty Blood. Para ello sólo debemos descomprimir y guardar su contenido en la carpeta C:Archivos de programaAdobeAdobe PhotoshopPresetsBrushes. Luego debemos Cargar estos pinceles en PS.

    En una Nueva Capa a la que le llamaremos Lágrima y con el pincel Blood1 (color frontal Blanco y color secundario Negro) colocamos la forma de la lágrima sobre el rostro de la protagonista.

    First we must install the brush set Pretty Blood. To do this decompress and save the content in the file C:Program FilesAdobeAdobe PhotoshopPresetsBrushes. Later we must load these brushes to PS.
    In a New Layer, which we will call Tear, using the Blood1 brush (fore colour White and secondary colour Black) place the shape of the tear on the face of the subject.

    Añadimos la forma de la lágrima

    Ahora ajustamos el Relleno de la capa Lágrima al 85%, ajustamos la Opacidad y le aplicamos Bisel y Relieve (Bevel and Emboss) con una Profundidad (Deep) del 50% y Suavidad (Soften) a 0px.

    Con la herramienta Borrador eliminamos gradualmente la lágrima por arriba.

    Por último debemos seleccionar Aclarar (Lighten) como Modo de Fusión de la capa Lágrima.

    Now adjust the fill of the Tear layer to 85%, adjust the Opacity and apply Bevel and Emboss with settings of Deep 50% and Soften 0px.

    With the Eraser tool gradually eliminate the tear from above.

    Lastly select Lighten as the Fusion Mode of the Tear Layer.

    Resultado final

  • Dévouement


    Abnegación, sacrificio y entrega al dominante. Un punto sin retorno. El humano pasa a convertirse en un seguidor del caudillo válaco Vlad Teppes, «El Empalador«.

    Abnegation, sacrifice and devotion to the dominant one. A point of no return. The human becomes a follower of the leader Vlad Teppes, “the impaler”.

    Dévouement - jgarcía © 2007 -

    Cámara Nikon D200
    Abertura f7.1
    Velocidad 1/250sg
    Longitud focal 70mm
    ISO 100

    No dejéis de leer la acertada interpretación que hace Osselin de este retrato.

    Make sure to read the spot on interpretation of this portrait by Osselin.
  • Diente de León de Sergio Cerezo


    Desde Buenos Aires (Argentina), nuestro amigo Sergio Cerezo nos envía una fotografía que realizó el mes pasado a su hija con una Canon EOS Digital Rebel para que la analicemos en la sección Fotoclínica.

    daughter which he took last month with a Canon EOS Digital Rebel to be analysed in the Photoclinic section.

    EOS Digital Rebel

    La fotografía original:

    The original photograph:

    Diente de León - Sergio Cerezo © 2006 -

    Los datos EXIF:
    Abertura f5.6
    Velocidad 1/250sg
    Longitud focal 300mm
    ISO 320

    Sergio aplicó este reencuadre durante el postprocesado para colocar a la protagonista en uno de los puntos claves de la Regla de los Tercios:

    Sergio applied this reframing during his post processing to place the subject in one of the main intersections of the Rule of Thirds:

    Diente de León - Sergio Cerezo © 2006 -

    Una preciosidad de fotografía. Sí señor. Tan sólo se le podría pedir más de nitidez y resolver la sobrexposición del brazo, rostro y pecho.

    Tras aplicarle una máscara de enfoque y ajustar el contraste, duplicando la capa y ajustando el Modo Fusión a Overlay-Superponer al 50% de Opacidad y Relleno.

    Without doubt a beautiful photograph. The only improvement would be more clarity and a reduction in the overexposure of the arm, face and chest.

    After applying an Unsharp Mask and adjusting the contrast, duplicating the layer and adjusting the Fusion Mode to Overlay at 50% of Opacity and Fill.

    Diente de León retocada por jgarcía


Web · Vídeos · Libros · Autor

Está estrictamente prohibida la reproducción, parcial o total de los contenidos de esta web, sin el acuerdo previo por escrito del autor.

García-Gálvez © 2005-2020