• Photography Rules


    El artículo en español ha sido traducido al inglés por mi amigo Simon.

    According to the Royal Spanish Academy a Decalogue is a set of rules, not necessarily ten in number, or advice which is basic in order to carry out any activity.
    Photography  Rules

    These 50 points are maxims to follow which any photography lover should know, remember and put into practice.

    1.Study the camera’s instruction manual. We should master the functions of the instrument with which we are going to take photographs.
    2. Don’t use sunglasses while taking photos.
    3. Use the maximum resolution of the camera. If possible use RAW.
    4. Bear in mind the considerable limitations of the built in fill-in flash of the camera.
    5. With each download of photos (card-PC) make a back up copy
    6. Archive the photos by category and in chronological order.
    7. Never apply any post processing to the original photo; use a copy.
    8. Be careful how we hold the camera. Fingers should never cover the flash or auto focus assist lamp.
    9. Avoid the use of a compact camera’s digital zoom.
    10. To save battery power leave the LCD screen turned off.
    11. Before a photo session make sure the batteries are fully charged. A spare battery is recommended.
    12. Hold the camera firmly with both hands and with elbows held against the body. Sometimes it may be necessary to lean on something, kneel down or even lie down on the floor.
    13. Press the shutter button gently to avoid any loss in clarity of the image.
    14. Before beginning a photo session make sure the memory cards are empty.
    15. Take time to observe and select the frame. Avoid elements which do not provide information/beauty to the image.
    16. Take various shots from different angles when we find an interesting subject.
    17. With compact cameras be careful with the border details as what is seen on the screen is not the same as what will be taken through the lens (parallel error)
    18. Avoid inclined horizons. Hold the camera straight at the moment of shooting.
    19. Do not reject vertical format shots.
    20. The best light can be had at the early morning and late evening hours. Avoid the midday sun.
    21. Overcast/cloudy days provide a diffuse light which is ideal for portrait and landscape shots.
    22. Avoid the Bull’s-Eye Effect.
    23. Understand the Rule of Thirds and the Golden Ratio.
    24. Bear in mind the rule of sight.
    25. Consider the rule of movement.
    26. Apply in most shots the rule of the horizon.
    27. Use Vanishing Point as a photographic resource to improve our compositions.
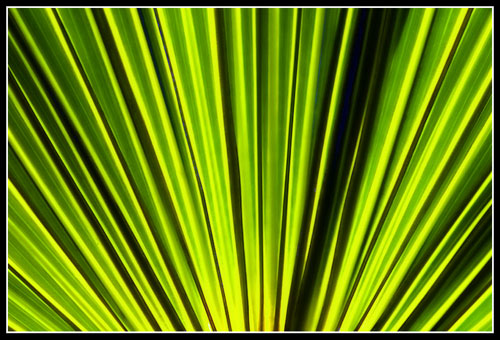
    28. Make use of Patterns in our compositions.
    29. Assure that the photographer’s shadow does not enter the image.
    30. Use a tripod when using shutter speeds slower than 1/80 sec.
    31. In portraits:

    • Always focus the eyes of the model.
    • Get as near as possible in order to show all the facial details.
    • Try to obtain a pose or expression which is characteristic of the model.
    • Use balanced lighting (a light source each side of the model) to avoid shadows and so as to not emphasize facial wrinkles.
    • Don’t cut the image off at a joint (knee, ankle, waist)
    • Look for naturalness. Keep the models occupied.

    32. Child photography:

    • Try to have an assistant to prepare and chat with the child, to show him/her something of interest, to provide something which attracts the attention so as to distract the child while we shoot. The objective is to capture spontaneous expressions.
    • The camera should be at the height of the child
    • Get as near as possible to the child
    • Use fast shutter speeds (above 1/250 sec) to avoid blurred images.
    • Add toys or other brightly coloured objects to the scene.
    • Look for simple backgrounds.
    • Make use of the continuous shooting mode of the camera in order to take many photos in a short period of time.
    • Look for shots with the sun behind, diffuse lighting, and overcast days to capture the soft complexion of children.
    • Never place the child facing the sun.
    • A small lack of clarity of the hands or feet emphasizes the sensation of movement.

    33. In landscape shots include objects in the foreground to frame the landscape and to give the impression of perspective.
    34. In panoramic shots include people, which will serve as a reference and make the viewer feel part of the scene.
    35. In snowy landscapes we should open the diaphragm up to two points in order to achieve a brilliant, white snow. The excessive reflected light would mislead the photometer and so if not we would obtain dark photographs with grey snow.
    36. Bear in mind negative space as a photographic resource.
    37. Examine the background before shooting. We should look for neutral backgrounds and if possible, they should be out of focus in the image. The idea is to avoid confusing backgrounds which steal attention from the subject of the photo.
    38. The built-in flash is useful as a fill in light source in exterior shots for photos taken at midday and in general when the sun produces annoying shadows on the face of the model.
    39. For the majority of users who generally make copies of size 10×15, a camera of 3.2 megapixels is more than sufficient.
    40. Be careful on the beach. Salt water and sand are dangers for the camera.
    41. Make sure the main subject of the photo is precisely focussed.
    42. Try to take photos which attract our attention and show just one idea, without unnecessary details (to achieve this simplicity get close to the subject and choose a simple background).
    43. A cut exists as a photographic resource but this shouldn’t be confused with involuntary cuts. We should avoid cuts of the head and feet.
    44. Look after your equipment:

    • The lenses, filters, and the sensor (see sensor cleaning) should be clean and free from dust and fingerprints.
    • Avoid extreme temperatures. For example, don’t leave your equipment inside the car and in the sun.
    • Transport equipment in a rucksack or an appropriate bag (padded and isolated from humidity). LowePro are recommended.
    • On plane journeys use rigid cases for the equipment. With new security measures we cannot take our equipment on board as hand luggage in the rucksack).

    45. View and study the works of masters using internet, books, museums, expositions. Ask yourself: Why does this image captivate me?
    46. Take advantage of the non-contemporary look of black and white and sepia prints.
    47. During the photo session (be it interior or exterior) we should not feel rushed.
    48. Look for information in internet. Everything can be found there.
    49. Don’t be afraid to experiment with your photographic equipment.
    50. Practise, practise, practise.

    Contributions from the friends of jggweb:
    1. Check the ISO value before shooting.
    2. In order to achieve the correct exposure make use of exposure compensation.
    3. A tripod is essential when using long focal ranges or slow shutter speeds.
    4. When using a zoom select a minimum shutter speed of half the focal distance.
    5. When taking travel photographs of journeys we should get close to the subject; that is the traveller. The monument will appear as a frame, as the scene of the adventure. So we will avoid the typical photo with far off (miniscule) subjects and the monument as the background.

  • Decálogo del Fotógrafo


    Según el diccionario de la Real Academia Española, un decálogo es un conjunto de normas o consejos que, aunque no sean diez, son básicos para el desarrollo de cualquier actividad.
    Decálogo del Fotógrafo por jgarcía
    En este caso no son todas las reglas que el fotógrafo debe tener en cuenta… pero este medio centenar de consejos son máximas que deberíamos de conocer, memorizar y poner en práctica todos los amantes del bello arte fotográfico.

    1. «Estudiar» el manual de nuestra cámara. Debemos dominar las funciones del instrumento con el vamos a captar imágenes.
    2. No usar gafas de sol cuando vayamos a hacer fotos.
    3. Trabajar con la máxima resolución que permita la cámara. Si es posible, en RAW.
    4. Tener presente las grandes limitaciones del flash de relleno que tiene incorporado la cámara.
    5. En cada descarga de las fotos (tarjeta-PC), hacer copias de seguridad.
    6. Archivar las fotos atendiendo a categorías, y ordenarlas cronológicamente.
    7. Aplicar los postprocesados sobre copias de las tomas, nunca sobre imágenes originales.
    8. Cuidar la forma en la que cogemos la cámara. Los dedos nunca deben tapar el flash o el sensor de enfoque.
    9. En el caso de cámaras compactas evitar el zoom digital.
    10. Mantener apagada la pantalla es una medida que ahorrará energía de nuestras baterías.
    11. Antes de una sesión fotográfica debemos asegurarnos de que tenemos baterías cargadas. Recomendable tener una/s de reserva.
    12. Sostener la cámara firmemente con las dos manos y con los codos pegados al cuerpo. En ocasiones, es mejor apoyarse en algo, arrodillarse o incluso tumbarse en el suelo.
    13. Pulsar el disparador con suavidad para evitar la perdida de nitidez de la imagen.
    14. Asegurarnos de que tenemos las tarjetas de memoria vacías antes de comenzar una sesión fotográfica.
    15. Dedicar tiempo a observar y seleccionar el encuadre. Evitando elementos que no aporten información/belleza a la imagen.
    16. Hacer varias tomas desde distintos ángulos cuando encontremos un motivo interesante.
    17. Con las cámaras compactas debemos cuidar los detalles cerca de los bordes, pues lo que se ve en el visor es diferente a lo que se registrará por el objetivo (error de paralaje).
    18. Evitar los horizontes inclinados. Para ello, sujetaremos la cámara derecha, en el momento de disparar.
    19. No desestimar el formato vertical.
    20. La mejor luz del día las disfrutaremos en las primeras horas de la mañana y las últimas de la tarde. Evitar la luz del mediodía.
    21. Los días cubiertos/nublados proporcionan una luz difusa ideal para retratos y paisajes.
    22. Evitar el Ojo de Buey.
    23. Conocer la Regla de los Tercios y la Composición Divina.
    24. Tener presente la Ley de la Mirada.
    25. Contemplar la Ley del Movimiento.
    26. Aplicar en la mayoría de las composiciones la Ley del Horizonte.
    27. Utilizar el Punto de Fuga como recurso fotográfico para mejorar nuestras composiciones.
    28. Hacer uso de Patrones en nuestras composiciones.
    29. Evitar que se registre nuestra sombra (la del fotógrafo) en la imagen.
    30. Con velocidades de obturación inferiores a 1/80sg utilizar trípode.
    31. En retratos:
      • Enfocar siempre los ojos del modelo.
      • Debemos acercarnos todo lo que podamos para mostrar todos los detalles de la expresión del rostro.
      • Buscar una pose o una expresión característica de la persona fotografiada.
      • Para no enfatizar las arrugas faciales, utilizaremos iluminación equilibrada (dos fuentes de luz, una a cada lado del sujeto), para evitar sombras.
      • No aplicar cortes por las articulaciones (rodillas, tobillo, cintura).
      • Buscar la naturalidad en nuestros modelos. Para ello mantenerlos ocupados.
    32. Fotos a niños:
      • Se recomienda tener un ayudante que se ocupe prepararlo, de charlar con él, de mostrarle algo que le interese, de ofrecerle algún objeto que le llame la atención con el fin de distraerlo mientras se le dispara. Nuestro objetivo es captar expresiones espontáneas.
      • La cámará debe de estar a la altura del niño.
      • Acércate todo lo que puedas al modelo.
      • Utiza velocidades rápidas (superiores a 1/250 sg), para evitar fotografías movidas.
      • Añadir en el escenario juguetes u otros objetos de colores vivos.
      • Buscar fondos sencillos.
      • Hacer uso del modo Disparo Continuo de la cámara, para realizar muchas capturas en un intervalo muy pequeño de tiempo.
      • Buscar los contraluces, puntos de luz difusa y días cubiertos para registrar la suave complexión de nos niños.
      • Nunca pongas al niño de cara al sol.
      • Una ligera falta de nitidez de las manos o los pies, acentúa la sensación de movimiento.
    33. En los paisajes incluir motivos en primer plano para enmarcar el paisaje y dar la impresión de perspectiva.
    34. En las tomas panorámicas incluir personas, que servirán de referencia y hacen que el observador se sienta parte de la escena.
    35. En paisajes nevados debemos abrir hasta dos puntos el diafragma para conseguir una nieve blanca y brillante, pues la excesiva luz reflejada engañará al fotómetro y por tanto obtendremos fotografías oscuras y con la nieve gris.
    36. En nuestras composiciones tener en cuenta el Espacio Negativo como recurso fotográfico.
    37. Examinar el fondo antes de disparar. Debemos de buscar fondos neutros y, si es posible, desenfocarlos. Nuestro objetivo es evitar los fondos confusos que quiten protagonismo al sujeto.
    38. El flash incorporado resulta útil como iluminación de relleno en exteriores para fotografías realizadas al mediodía y en general, siempre que el sol produzca sombras molestas sobre el rostro de nuestros modelos.
    39. Para la mayoría de los usuarios (generalmente hacen copias de 10×15) con una cámara de 3.2Mpx tienen más que suficiente.
    40. Cuidado en la playa. El agua salada y la arena son elementos muy peligrosos para la cámara.
    41. Enfocar con precisión el tema principal.
    42. Debemos buscar fotos que despierten la atención y muestren una sola idea, sin detalles innecesarios (para mantener la sencillez debe acercarse al motivo o escoger un fondo simple).
    43. Existe un recurso fotográfico llamado Los Cortes que no debemos confundir con los recortes involuntarios. Debemos evitar los cortes de cabezas y pies.
    44. Cuidar el equipo:
      • Los objetivos, filtros y el sensor (ver limpieza sensor) deben estar limpios y libres de polvo o huellas.
      • Evitar las temperaturas extremas. Por ejemplo, no dejar nuestro equipo en el coche al sol.
      • Trasportar el equipo en una mochila o bolsa apropiada (acolchada y que aisle de la humedad). Recomendables las mochilas LowePro.
      • En desplazamientos en avión, utilizar maletas rígidas para el equipo fotográfico (con nuevas medidas de seguridad aerea no nos dejaran pasar a la cabina con la mochila).
    45. Ver y estudiar las obras de maestros vía internet, libros, museos y exposiciones. Preguntarnos: ¿Por qué me cautiva esta imagen?
    46. Aprovechar la atemporalidad de las copias en blanco y negro o en sepia.
    47. Durante la sesión fotográfica (sea interior o exterior) debemos huír de las prisas.
    48. Buscar información en la Red. Todo está ahí.
    49. No tener miedo a experimentar con el equipo.
    50. En nuestros viajes… registrar los letreros, señales verticales y demás indicadores de localización que nos vamos encontrando para poder disponer a nuestro regreso de una ayuda visual que nos facilite recomponer todos los itinerarios.
    51. Cuando encuentres algo que te guste, retrátalo. No pienses que puedes hacerla en otra ocasión.
    52. Practicar, practicar, practicar.
    53. Comprobar el valor ISO, antes de realizar una toma. – Nina
    54. Hacer uso de la Compensacion de Exposicion, para lograr exposicion correctas – Nina
    55. Imprescindible tripode en distancias focales muy largas, o velocidades bajas.- Nina
    56. En el caso de utilizar Zoom , poner como velocidad minima, la mitad de la distancia focal, de este.- Nina
    57. En fotos de viajes debemos acercarnos al protagonista del reportaje, es decir, al viajero. El monumento saldrá como marco, como escenario de la aventura. Evitando la típica foto con sujetos lejanos (diminutos) y el monumento al fondo – Txirloro
    58. No eliminar nunca imágenes desde la propia cámara. Es facil borrar por error la mejor de una serie de fotos – Miguel Michán
    59. #DecalogoFotografo [Extra] Lleva siempre una cámara. La principal o la secundaria.¿Cuántas veces has visto una foto y no llevabas tu cámara?
    60. ‎#DecalogoFotografo [Extra] Si vas a pasar mucho tiempo sin usar la cámara extrae las baterías.
    61. #DecalogoFotografo [Extra] Elige bien tu equipo. Menos es más.
    62. #DecalogoFotografo [Extra] Si usas filtros UV para proteger tus objetivos no olvides retirarlos cuando hagas fotografía nocturna. Evitarás perdida de calidad y reflejos.
    63. #DecalogoFotografo [Extra] Para hacer fotos de cuerpo entero sin distorsionar la figura: cámara a la mitad de altura del sujeto, punto de vista perpendicular al protagonista, focal entre 50mm y 100mm..
  • Perspectiva Fotográfica


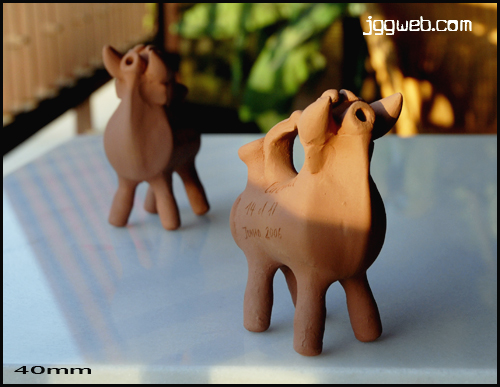
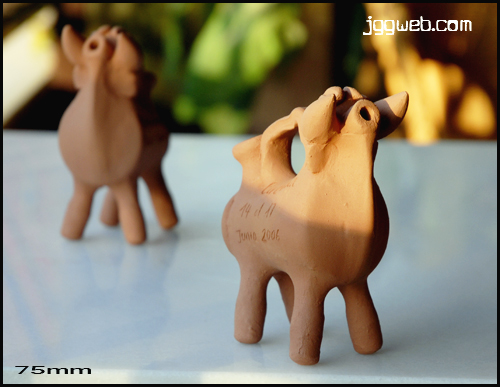
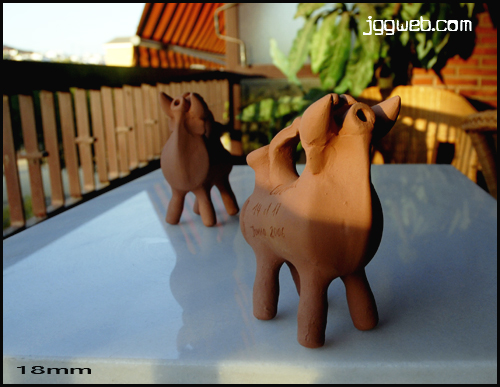
    La perspectiva es un efecto visual que depende de la longitud focal utilizada. El fondo de la imagen parecerá estar más cercano (uso de teleobjetivo) o más lejano (uso de angular) del sujeto, dependiendo de la distancia focal utilizada.

    Es decir:

    • Si utilizamos un objetivo angular el fondo aparecerá en la distancia y el sujeto en un primer plano destacado.
    • Si utilizamos un teleobjetivo el fondo parece comprimirse, disminuyendo la separación entre los planos.

    Veamos un ejemplo práctico para ilustrar el efecto de perspectiva:

    Hagamos tres fotografías a un mismo objeto. Cada una de ellas a distancias distintas (desde el objeto a la cámara).

    Nuestro propósito es que el tamaño del sujeto sea el mismo todas las fotografías. Para mantener ese tamaño en la imagen hay que cambiar la longitud focal del objetivo: al aumentar la distancia al objeto (lo que hace la imagen más pequeña) hay que aumentar también la distancia focal (para obtener el tamaño deseado).

    Perspective is a visual effect which depends on the focal length used. The background of an image will seem to be nearer to (using a telephoto lens) or further away from (using a wide angle lens) the subject, depending on the focal distance used.

    That is:

    • If we use a wide angle lens the background will be in the distance and the subject will stand out in the foreground.
    • If we use a telephoto lens the background will appear compressed, reducing the separation between the two planes.

    Let’s see a practical example to illustrate the effect of perspective:

    Let’s take three photographs of the same object. Each one at a different distance (from the object to the camera).

    Our objective is that the size of the subject is the same in each of the three photographs. In order to maintain the same size in the image we must change the focal length of the lens: as we increase the distance from the object (which makes the image smaller) we have to also increase the focal length (to obtain the desired size).

    18mm -jgarcía 2006 -

    18mm -jgarcía 2006 -

    18mm -jgarcía 2006 -
    Por último, debemos tener en cuenta que si modificamos la distancia focal del objetivo y manteniendo la distancia entre cámara y sujeto, no se producirá ningún cambio en la perspectiva de la imagen.

    Lastly, we should bear in mind that if we modify the focal distance of the lens and maintain the same distance between the camera and the subject, there will be no change in the perspective of the image.
  • Líneas Rectas


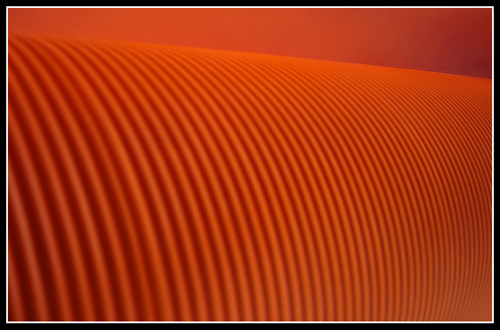
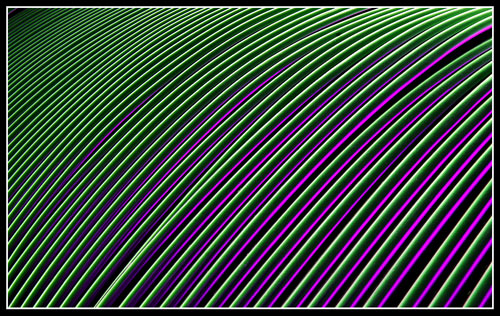
    Las líneas dominantes son un recurso que se utiliza con mucha frecuencia para construir imágenes cautivadoras porque guían la vista del espectador hacia el interior de la imagen, conduciéndole hasta el punto de interes.

    El mundo real nos ofrece todo tipo de líneas dominantes: rios, montañas, árboles, huellas en la arena, surcos de un campo preparado para la siembra, edificios, puentes, productos en un mercado… sólo hay que buscarlos, encuadrar y disparar para que formen parte de nuestro archivo fotográfico.

    Dominant lines are much used to construct captivating images as they guide the view to the interior of the image, to the point of interest.

    The real world offers many types of dominant lines: rivers, mountains, trees, prints in sand, furrows in a field ready for sowing, buildings, bridges, products in a market… we only have to look for them, frame and shoot to make them part of our photographic archive.

    Brazo de un sofá.


    Líneas 1

    Fibra óptica.


    Líneas 2

    Hoja de una palmera.


    Líneas 3

  • Equilibrio Compositivo


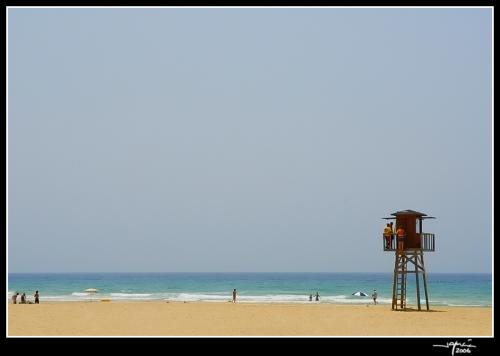
    El Equilibrio Compositivo es una apreciación subjetiva que garantiza el éxito de nuestras tomas. Existen dos formas básicas de encontrar el equilibrio: utilizando una composición simétrica o asimétrica.

    En esta toma los bañistas de la izquierda desequilibran la toma al encontrarse tan cerca del extremo izquierda.

    Compositive balance is a subjective appreciation which guarantees the success of our shots. There are two basic ways to achieve this balance: the use of symmetric composition or asymmetric composition.

    Here the bathers on the left unbalance the shot as they are positioned too near to the left side of the photograph.

    Playa Zahara de los Atunes 1 - jgarcía © 2006 -

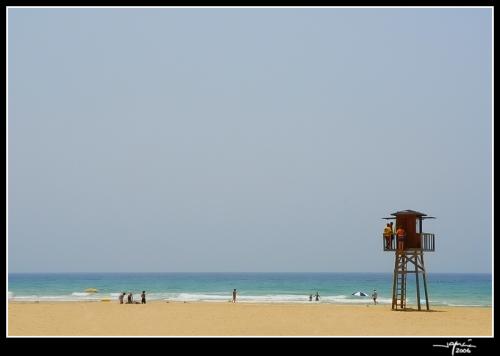
    Con un retoque básico (selección, copiar y pegar los bañistas y clonar mar y arena) podemos conseguir que la imagen final disfrute de un mayor equilibrio compositivo.

    With a basic retouch (selection, copy and paste the bathers and clone sea and sand) we can achieve a final image which has compositive balance and which is pleasing for the viewer.


    Playa Zahara de los Atunes 2 - jgarcía © 2006 -

  • Efecto Filtro Degradado Neutro


    Los filtros degradados de densidad neutra se han utilizado siempre para fotografiar paisajes. El filtro está dividido en dos partes (una oscura y otra clara) que se fusionan gradualmente.

    La finalidad de los Filtros de Degradados de Densidad Neutra (ND) es facilitar el equilibrio de las exposiciones entre dos zonas de la imagen.

    Por ejemplo, en situaciones en las que el cielo es mucho más luminoso que el suelo, la parte más oscura del filtro reduce ese exceso de luz permitiendo el registro de todos los detalles.

    Neutral density degraded filters have always been used to photograph landscapes. The filter is divided into two parts (one dark and the other clear) which gradually fuse together.

    The purpose of Neutral Density Degraded Filters (ND) is to provide equilibrium between the exposures of two areas of the image.

    For example, in situations in which the sky is much brighter than the ground, the darker part of the filter reduces that excess light allowing all the details to be registered.

    Filtro Degradado de Densidad Neutra

    Los filtros degradados más recomendados son los de factor 4, que aplican dos diafragmas menos en la mitad oscura.

    En plena Era Digital, cada día es más dificil encontrar filtros ópticos en las tiendas y grandes almacenes. Prácticamente todo lo que hacen los filtros se puede reproducir digitalmente durante el postprocesado.

    Para aplicar el Efecto Filtro Degradado Neutro vamos a utilizar un bello paisaje de un campo de girasoles obtenida por Carolyne Robbins-Pagel con una SONY CSC-H1.

    The most recommended degraded filters are those of factor 4, which apply two diaphragms less in the dark half.

    In this digital age it is more and more difficult to find optical filters in the high street. Practically everything that filters provide can be digitally reproduced during post processing.

    In order to apply the Neutral Degraded Filter Effect we shall use a beautiful landscape of a field of sunflowers obtained by Carolyne Robbins-Pagel with a SONY CSC-H1.

    Descripción del proceso:

    Description of the process:

    1.- Abrir la imagen con PhotoShop.

    1.- Open the image in PhotoShop.

    Fotografía original de Carolyne Robbins-Pagel

    2.- Capa/Nueva Capa de Ajuste/Curvas. Aplicamos un ajuste buscando el deseado contraste del cielo y las nubes. La llamaremos «Ajuste Curvas«.

    2.- Layer / New Adjustment Layer / Curves. Adjust searching for the desired contrast of sky and clouds. Let’s call it “Curve Adjustment”.

    Nueva Capa de Curvas

    3.- Nos aseguramos que tenemos seleccionada la capa recien creada, «Ajuste Curvas«.

    4.- Con la Herramienta Degradado (Negro-Transparente) dibujamos rectas que comenzarán en el límite inferior de la imagen y terminarán sobre el horizonte. Con cada línea conseguiremos aclarar la parte inferior de la fotografía.

    5.- Para terminar le apliqué una máscara de enfoque y un ajuste de la saturación del color.

    3.- Ensure that the recently created layer “Curve Adjustment” is selected.

    4.- With the Gradient Tool (Black-Transparent) draw straight lines which begin at the lower border of the image and finish at the horizon. With each line we will lighten the lower part of the photograph.

    5.- To finish I applied an Unsharp Mask and a Colour Saturation Adjustment.

    Retocada por jgarcía 2006

    Podemos conseguir resultados espectaculares durante el postprocesado, pero si hubieramos utilizado un filtro degradado para realizar esta fotografía… nos habríamos ahorrado un retoque digital adicional.

    We can achieve spectacular results during post processing but if we had used a degraded filter to take this photograph we would have saved ourselves this extra retouching.
  • Profundidad de Campo


    La profundidad de campo es el término con el que nos referimos al rango de distancias reproducidas con una aceptablemente nítidad en una fotografía.

    La profundidad de campo será mayor cuanto más cerrado se encuentre el objetivo, es decir, cuanto mayor sea el número del diafragma elegido. Por ejemplo, con un diafragma de f5,6 la profundidad de campo será muy limitada, mientras que con un diafragma de f16 o f22 será considerable.

    También debemos tener en cuenta que cuanto más cerca se encuentre el motivo que se desea fotografiar (caso de la macrofotografía), menor será la profundidad de campo, independientemente del diafragma seleccionado. Por otro lado, conforme más alejado se encuentre el motivo mayor será la profundidad de campo.

    Podemos generalizar diciendo que el uso de teleobjetivos reduce la profundidad de campo y los objetivos angulares la aumentan.

    Para ilustrar estos conceptos he sacado dos fotografías: la primera con una abertura de diafragma grande (f4.5) y la segunda con el diafragma pequeño (f13).

    The depth of field is the term with which we refer to the range of distances reproduced with an acceptable sharpness or clarity in a photograph.

    The depth of field will be greater the more the lens is closed, that is, the higher the number of the chosen diaphragm. For example, with a diaphragm of f5.6 the depth of field will be very limited while with a diaphragm of f16 or f22 it will be considerable.

    We should also take into account that the nearer we are to the subject to be photographed (as in the case of macro photography) the smaller the depth of field will be, independent of the diaphragm used. On the other hand, the further away we are from the subject the greater the depth of field will be.

    We can generalize and say that the use of a zoom lens reduces the depth of field and the use of a wide angle lens increases it.

    In order to illustrate these concepts I have taken two shots: the first with a large diaphragm aperture (f4.5) and the second with a small diaphragm (f13).

    Pequeña Profundidad de Campo

    Cámara Nikon D200
    Abertura f4.5
    Velocidad 1/640sg
    Longitud focal 70mm
    ISO 100

    Profundidad de Campo Mayor

    Cámara Nikon D200
    Abertura f13
    Velocidad 1/80sg
    Longitud focal 70mm
    ISO 100

    Otro concepto asociado a la profundidad de campo es la Distancia Hiperfocal, es decir, la distancia mínima a la que puede enfocarse un sujeto de forma que quede enfocado también el infinito. Este dato es muy importante para llevar a cabo paisajes con éxito.

    Podemos entender mejor la relación existente entre todos los factores que intervienen en la profundidad de campo realizando pruebas con la Calculadora de Profundidad de Campo y Distancia Hiperfocal.

    Another concept associated with the depth of field is the Hyperfocal Distance, that is, the minimum distance with which we can focus a subject so that infinity may also be in focus. This point is very important in order to take landscape shots successfully.

    We may understand better the relation between all the factors which intervene in the depth of field by carrying out tests with the Depth of Field and Hyperfocal Distance Calculator.

    En esta tabla podemos consultar las Distancias Hiperfocales para las aberturas y longitudes focales más comunes:

    In this table we can consult the Hyperfocal Distances for the most common apertures and focal lengths:

    Distancias Hiperfocales

  • Efecto Flare


    Flare en inglés significa llamarada, y con este término se nombra al efecto, en la mayoría de las ocasiones indeseado, que consiste en uno o varios círculos luminosos que cruzan nuestra fotografía.

    Se produce cuando los rayos del sol incididen directamente sobre la lente de nuestro objetivo. Con los objetivos gran angulares la probabilidad de que aparezcan estas luces parásitas es mayor.

    Para evitar este efecto debemos escoger bien el encuadre y/o utilizar parasoles en los casos de iluminación extrema. Podemos crear nuestros parasoles fácilmente gracias a LensHoods.

    Para ilustrar este fenómeno he seleccionado esta toma realizada en una playa del Sur de España, concretamente en Manilva (Málaga) y le añadí durante el postprocesado un efecto flare 50-300mm zoom al 98% de brillo.

    Flare is in most instances an undesired effect which consists in one or more luminous rings which cut across the photograph.

    It occurs when the sun’s rays directly affect the lens. When using wide-angle lenses the probability that these parasite lights appear is greater.

    To avoid this effect we should carefully choose the frame and/or use a lens hood in those cases of extreme illumination. We can easily create our own lens shades thanks to LensHoods.

    In order to illustrate this phenomenon I have selected this shot taken at Manilva (Málaga) in the South of Spain and I added during post processing a 50-300mm zoom flare effect at 98% brightness.

    Flare - jgarcía © 2006 -

  • Ritmo


    Se le llama Ritmo o Patrón a la repetición de líneas, formas, volúmenes, tonos y/o colores dentro de una imagen. Ya hicimos referencia a este recurso en el artículo Todas Menos Una.

    Con ritmo, conseguimos armonizar la escena, uniendo los diferentes elementos de la escena para aportarles unidad y fluidez.

    Las composiciones basadas en un patrón excesivamente radical, conviene romperlas con algún pequeño detalle discordante que atenúe su rigidez y proporcione un claro Punto Focal de Interés.

    Unas bolas de juguete me sirvieron para hacer esta fotografía cuyo Punto Focal de Interés (la bola roja) lo hice coincidir con uno de los puntos clave de la Regla de los Tercios.

    Rhythm or Pattern is the repetition of lines, shapes, volume, tones and/or colours within an image. This has previously been referred to in the article Todas Menos Una.

    With rhythm we harmonize the scene, uniting the different elements and so adding cohesion and fluidity.

    It is advisable to break any composition based on an excessively radical pattern with some small discordant detail which lessens the rigidity of the scene and provides a clear Focal Point of Interest.

    In this photograph I made use of some toy balls and the Focal Point of Interest (the red ball) was positioned to coincide with one of the key positions of the Rule of Thirds.

    Punto Focal de Interés - jgarcía © 2006 -

    Durante el postprocesado le apliqué un efecto pintura y le añadí grano.

    During post processing I applied a paint effect and I added grain.
  • Fisiograma


    Pintar con luz, dibujar con luz en el aire…

    Un fisiograma es el registro fotográfico de la trayectoria de una fuente luminosa en movimiento.

    Además de una fotografía experimental, los fisiogramas se emplean en la industria para examinar el funcionamiento de las diferentes piezas de las máquinas y para hacer estudios de tiempos y movimientos.

    Podemos crear un fisiograma con una linterna, en una habitación en completa oscuridad, con una abertura del diafragma de f8-f10 y una velocidad de obturación de 20-30 segundos (por lo que será necesario el uso de un trípode).

    Aunque siempre ajustaremos la exposición por ensayo/error, sobre todo si se usan filtros y se trabaja en color.

    Composición en púrpura.

    To paint with light, draw with light in the air…

    A “Fisiogram” is the photographic record of the trajectory of a luminous source in movement.

    As well as being an experimental style of photography, fisiograms are used in industry to examine the operation of the different parts of a machine and to carry out time and movement studies.

    We can create a fisiogram with a torch in a darkened room, using a diaphragm aperture of f8-f10 and a shutter speed of 20–30 seconds (for which reason the use of a tripod is necessary).

    Although we will always adjust the exposition through trial and error, above all if filters are used and we work in colour.

    Compostion in purple.

    Fisiograma Púrpura - jgarcía © 2006 -

    Composición en verde láser.

    Compostion in green laser.

    Fisiograma Verda Láser - jgarcía © 2006 -

    A esta última composición le apliqué una Inversión (Imagen/Ajustes/Invertir) para aclarar el fondo y osquerecer las estelas.

    To this last photograph I applied an Inversion (Image/Adjustment/Invert) to lighten the background and darken the trail of light.

    Fisiograma Invertido - jgarcía © 2006 -


Web · Vídeos · Libros · Autor

Está estrictamente prohibida la reproducción, parcial o total de los contenidos de esta web, sin el acuerdo previo por escrito del autor.

García-Gálvez © 2005-2020